Building a Sequence
When you click + Create Sequence, Taleva first asks how you'd like to build it. Rather than forcing everyone down the same path, it offers three starting points, so whether you want speed, full control, or to reuse past work, there's an option that fits.
Choosing How to Start
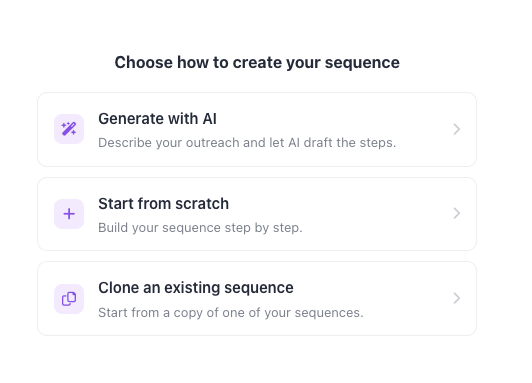
- Generate with AI: Describe your outreach in plain language and let Taleva's AI draft the steps for you. This is the fastest way to get a working sequence off the ground, giving you a solid structure you can refine rather than starting from a blank page.
- Start from Scratch: Build your sequence step by step with full manual control. This option is best when you know exactly what you want (each channel, message, and delay) and prefer to craft every detail yourself.
- Clone an Existing Sequence: Start from a copy of one of your existing sequences. This is ideal when you already have a proven flow and want to adapt it for a new audience or role without rebuilding it from the ground up.
You can exit this screen at any time using Close in the top-right corner.
The Sequence Builder
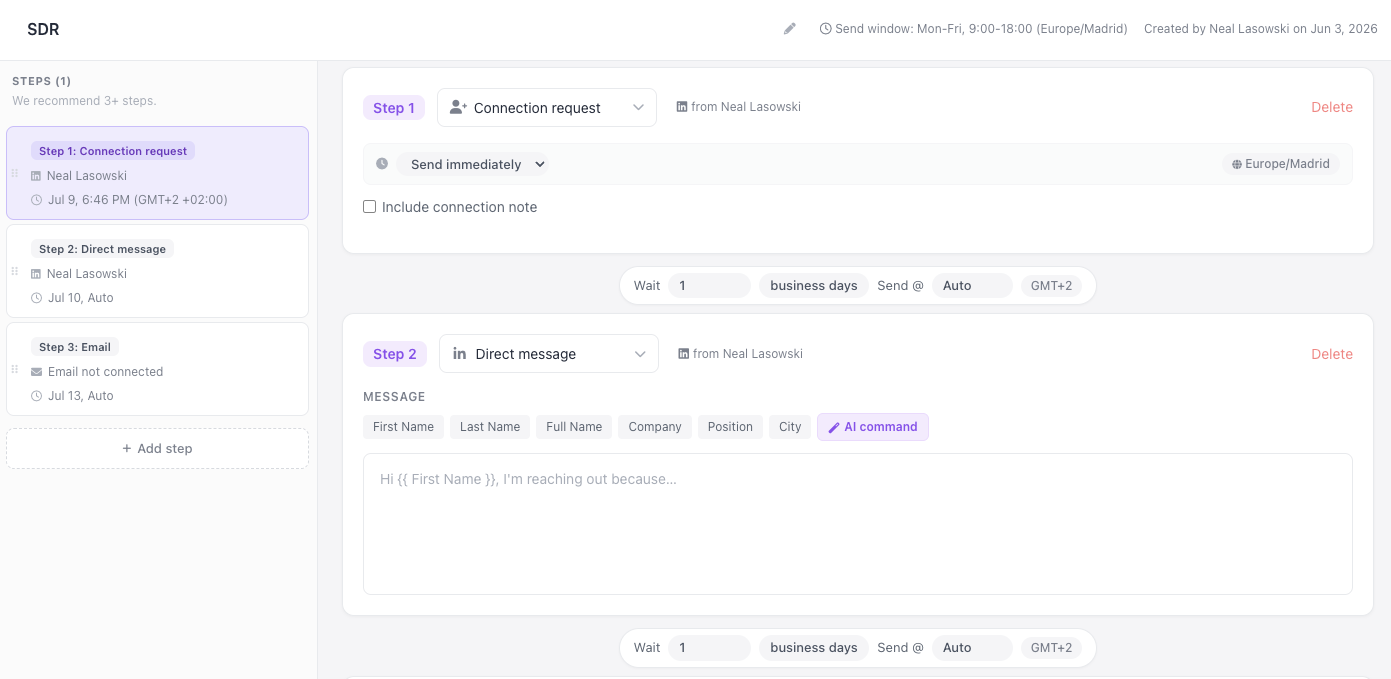
The sequence builder is where you assemble your outreach flow step by step. Each sequence is made up of individual steps (the actions Taleva takes on your behalf), separated by wait times that control the pace. The left panel keeps an ordered summary of your steps, while the main area lets you configure each one in detail.
You have full flexibility to build the sequence however you want. A common example combines a Connection Request, a Direct Message, and an Email, but you can mix and match whichever steps suit your outreach.
Tip
Taleva recommends 3 or more steps for effective outreach.
Sequence Settings (Top Bar)
Before configuring steps, the top bar defines how the whole sequence behaves:
- Sequence Name: Give your sequence a clear, descriptive name (e.g., Senior AI Engineer, Munich) so it's easy to identify in your overview.
- Send Email To: Choose which email address to prioritize when a candidate has more than one, for example Personal then Corporate (default).
- Send Window: Defines the days and hours your messages are allowed to go out (e.g., Mon to Sun, 8:00 to 20:00, Europe/Madrid). This ensures outreach lands at appropriate times. You can adjust it via Change in Settings.
- Save / Cancel: Save your progress at any point, or cancel to discard the sequence.
Adding and Managing Steps
Each step represents a single touchpoint. Using + Add Step, you can select which type of step to add next and build out a multi-channel flow in any order. Every step can be individually configured or removed with Delete. The step types include:
- Connection Request: Sends a LinkedIn connection request from your account. You can optionally tick Include connection note to add a personalized message with the invite.
- Direct Message: Sends a LinkedIn message, typically used after a connection is accepted.
- Email: Sends an email from your connected inbox, complete with a subject line and a rich-text body.
Controlling Timing
Between every step, a Wait block sets the delay before the next action fires, giving your outreach a natural, non-intrusive rhythm:
- Wait Duration: Set how long to pause between steps, measured in business days (for example, Wait 1 business day or Wait 2 business days), so your outreach never goes out over weekends or unexpectedly.
- Send Timing: Choose when the step goes out within your send window. Auto lets Taleva pick the optimal moment, and the timezone (e.g., CEST / Europe/Madrid) is shown so timing is always transparent.
- Per-Step Scheduling: The first step can be set to Send immediately or scheduled, giving you control over exactly when the sequence begins.
Personalizing Your Messages
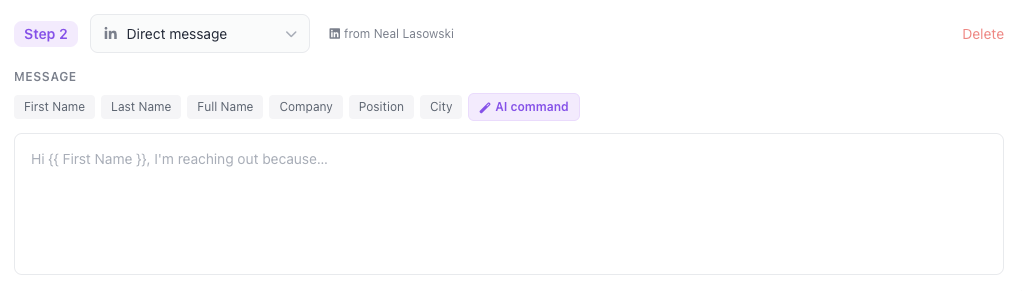
Both Direct Message and Email steps support dynamic personalization so each candidate receives a tailored message at scale:
- Personalization Tokens: Insert variables like First Name, Last Name, Full Name, Company, Position, and City directly into your text. Taleva automatically fills these in for each contact when the message sends.
- AI Command: Use the AI command option to edit and refine your message content on the fly, helping you write compelling, relevant copy faster.
- Email Formatting: Email steps include a full rich-text editor (bold, italic, underline, font and size controls, lists, links, and color) plus a dedicated Subject line and Cc/Bcc fields for more formal outreach.
Best for: designing a complete, multi-channel candidate journey, combining LinkedIn and email touches, spaced by smart delays and personalized to each recipient.